Beginner's Guide: Learn to Paint Dot Mandalas
AFFILIATE DISCLOSURE
Disclaimer: This blog post contains affiliate links. I may earn a small commission to fund my coffee drinking habit if you use these links to make a purchase. You will not be charged extra, and you’ll keep me caffeinated. It’s a win for everyone, really. As an Amazon Associate, I earn from qualifying purchases at no cost to you.
Dot Mandala Painting for Beginners: Essential Techniques and Tips to Get Started
Dot mandala painting is a simple and enjoyable way to create beautiful, symmetrical designs using small dots of paint. It’s accessible to beginners because it requires only a few basic tools and straightforward techniques that anyone can learn. This art form offers a focused, calming experience that helps me concentrate and enter a state of flow.
Understanding the right supplies and mastering a few fundamental dotting methods can quickly result in beautiful outcomes. I found that starting with a basic color palette and practicing consistent dot sizes made the creative process smooth and rewarding.
Once you grasp the essentials, you can experiment with shapes and colors to develop your unique style. Each dot builds on the last, turning simple dots into intricate patterns that feel both meditative and satisfying.
Key Takeaways
Basic tools and simple steps make dot mandala painting easy to start.
Approaching each project with a plan, setting up guidelines, and having a organized workspace will set you on a path for success.
Consistent dotting techniques improve the overall design quality.
Experimenting with colors and patterns helps personalize your artwork.
Essential Supplies for Dot Mandala Painting
If you are brand new to creating dot mandalas, you do not need to invest a lot of money in supplies. Below is a list of helpful tools, but not all are required for your first attempt. I'd encourage you to use things you already have until you decide if this is a creative practice you enjoy. If you find your first mandala enjoyable and you feel the pull to create more, then perhaps consider purchasing a few inexpensive tools.
Dotting Stylus
I use dotting tools specifically designed for mandala work because their various tip sizes help me make consistent dots. Sets typically include plastic, metal or wooden styluses with tips ranging from 1mm to 10mm in diameter. Some are straight rods while others have a tapered tip or even a ball tip.
If dotting tools aren’t available, you can opt for household items like toothpicks, ballpoint pens (empty), or cotton swabs. However, you will have greater success with better tools. A beginner tool set can typically be found online for $10-15. There are tool sets and kits that are much more than this, but there is no need to invest much when you are starting out. You will be able to create beautiful pieces with a basic tool set. Here is an example of a good beginner set of dotting rods/ dotting styluses. This set was less than $10 and includes 7 different sizes of dotting rods.

Ball- headed Stylus
Once you have gotten comfortable with making basic dots, you will want to learn two more advanced techniques, walking the dots and swooshes. Both these techniques are easier with specific tools. As your mandala practice expands you will want to try some ball headed styluses. I prefer this type of stylus when walking the dots, a technique where your dots gradually get smaller and smaller.
The photo on the left shows several ball headed styluses of different sizes. You would be fine just trying a single size at first, no need to have multiple sizes until you decide if you like the results of using this tool.

Paintbrushes
So, you have your basic dotting rods along with a couple dotting rods with the ball tips - you are almost all set! You may find that having a couple good paintbrushes will help you make swooshes. You should look for paintbrushes with long narrow bristles, sometimes called script tracers or scripting brushes. The white ones above are specifically for dotting but the red ones are almost identical and can be found in any art supply store. I believe the red ones are actually watercolor brushes, but they work just fine!
Fine Tipped Dotting Tool
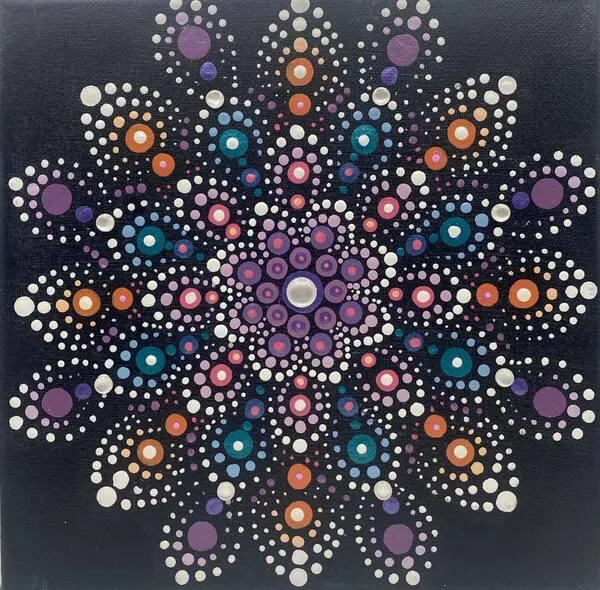
The only other tool you may want is a dotting tool with a very fine tip. My favorite one is pictured above in the center photo. See how small that dotting tip is? This helps make the smallest dots you can think of. This can also be used when making swooshes to help "move" some of the paint in the exact spot you want it to be. This type of tool is great but also optional as you get started. It made the small white dots you see on this mandala.

Recommended Paints
I prefer acrylic paints for dot mandalas due to their fast-drying nature and vibrant colors. They adhere well to most surfaces and are easy to layer without smudging. Consistency of the paints is key! Once you get your paint the right consistency, you will find making consistent dots much easier. The best suggestion I have for beginners is to start by using a brand of paint that is the right consistency directly out of the bottle. I find the only brand that works right out of the bottle is Americana by DecoArts.

The good news is that this is one of the most widely available and least expensive brands. You will find it at any arts and crafts store but also at big box stores like Walmart. It is commonly found in the section called "craft paints." It comes in a huge variety of colors and is priced so that you can get several bottles for under $10. I recommend picking up 3 to 4 coordinating colors plus white. There is no reason to purchase a million colors until you decide you love creating mandalas - then you have my permission to buy every color they make!
Painting Surfaces
You will likely want to paint some surfaces black so your mandalas really pop. You can use the Americana brand black paint for this purpose, but I prefer to use a multi-surface paint. This is just personal preference; I prefer having a satin or matte finish as the base on my pieces.

You have some tools, you have a few paints, now you need to figure out what surface you want to paint on. For beginners, smooth surfaces like canvas panels, wooden plaques, or thick paper work best. These materials hold paint well. I personally like using pretreated wooden panels and avoid using regular canvas. I find the canvas has too much "give" and can sink in the middle making the mandalas uneven.
Avoid overly textured or absorbent surfaces like canvas boards or untreated wood because they can distort the dot shape and soak paint unevenly.
Experiment with different surfaces and with different shapes of preferred surfaces. I find wood cutouts in various shapes like hearts, moons, and letters make interesting pieces. I often make small mandala designs on coasters, either wood or ceramic tiles. Explore your local craft and hobby store and you might be surprised how many different surfaces are readily available to create your mandalas. I've even created mandalas on empty wine bottles and they have turned out super cute!
Other Supplies
A small cup of water and paper towels are essential for cleaning tools between colors. I always have a palette or disposable plate for mixing and thinning paint when needed. I work directly from a small palette. It is much easier to squirt a little paint into the well in a palette, then dip your tools in that versus trying to dip your tool directly into the paint bottle.
A small stash of cotton swabs close by to help quickly wipe away mistakes is also critical! Pro tip - precision tip cotton swabs (the ones that have a point) are fantastic for cleaning up some errors because they can get into small spaces without disturbing neighboring dots.
Fundamental Techniques for Beginners
Workspace Preparation
Having a good work area is often overlooked, but I think it is one of the most important steps in setting yourself up for a successful creative session. I prepare a clean, flat workspace with good lighting, often natural daylight or a bright LED lamp, to see colors and details clearly. Make sure you have enough room for not only what you are painting, but to have all your supplies within reach.
I find placing my painting surface on top of a lazy susan helps me complete the project without having to reach awkwardly. I spin the painting as I work so the area I'm painting is always right in front of me. Here is the spinning tool I use, although you could go with a typical kitchen lazy susan just as well. Protective covering such as craft paper or a silicone mat beneath my work surface prevents paint stains. Acrylic paint will stain clothes, so make sure to wear an apron or clothes that you can get stained up without an emotional breakdown!
Planning the design
I begin by defining the size of my mandala and the paper or canvas dimensions. First, using a ruler and sometimes a stencil, I find my center point and draw lines dividing the mandala evenly.

Next using a compass, I lightly draw concentric circles to serve as guides. This step ensures symmetry and keeps dots evenly spaced. Once I have this light grid drawn, I'm ready to start dotting.

I decide on simple patterns like dots arranged in rings or basic shapes such as circles and petals. I draw basic shapes first with pencil, then apply dots along these guides. Keeping the design manageable helps reduce mistakes and frustration. I recommend avoiding overly complex designs until you gain confidence with dot placement and spacing.
Color Selection and Harmony
For my first mandalas, I limited my palette to three or four colors. This prevented visual clutter and allowed me to focus on applying dots correctly. I choose colors that work well together like blues and purples or complementary pairs like yellow and violet.
White is always a good choice to have on hand for accent dots and coordinates with virtually every color scheme you select.
Step by Step Process
I start by dipping my dotting tool into the chosen paint. Then, I apply dots following the guides, starting from the center and working outward in rings.
Holding the tool perpendicular to the surface helps produce round, even dots. I dip it lightly into paint and apply a steady press without dragging. I maintain consistent pressure to keep dots uniform in size. I reapply paint before every dot! Do not focus on being quick, focus on being accurate. Dip your tool, apply the dot, dip your tool, apply the dot. There is no shortcut. You will eventually fall into a rhythm.
I vary dot sizes by changing the tool tip. Large dots set the design’s main points, while smaller dots fill detail and texture. Spacing influences the pattern's rhythm. Crowding dots creates solid shapes; spacing them allows the background to show and adds complexity.
Troubleshooting Common Mistakes
Mastering dot mandala art involves addressing common challenges and gradually shaping your unique artistic voice. I focus on adjusting my technique when mistakes occur and experimenting until the design feels personal.
When dots are uneven, I first check my tool’s tip and the paint’s consistency. Too thick paint causes blobs, while too thin paint makes dots spread. Having dried paint on your tool tip will almost always caused lopsided and uneven dots. Clean your tools!
If symmetry isn’t perfect, I use a compass or pre-drawn gridlines for precision. Consistency in spacing improves with slower dot placement.
If the dot spreads too much, the paint might be too thin or the surface non-absorbent. Adjusting paint thickness or using a paint that is the correct consistency out of the bottle will help.
Before attempting a challenging section or a new technique, I wait for the previous dots to dry. This way if I make a mistake, I can easily wipe away the new marks without disturbing the previously completed accurate portions. Sometimes I use a hot air gun (on low heat settings) or a hairdryer to dry my paint before the next layer is applied. Just be careful to not apply so much heat that your paint bubbles!
Frequent practice with these fundamentals prepares me for layering dots and experimenting with brushstrokes in addition to dots.
Developing Your Own Style
I start by copying patterns to understand structure, then tweak elements like color schemes or dot sizes. Over time, I combine different patterns for a hybrid design.
Choosing color blends that resonate with me helps make the work recognizable. I take photos of my work to track progress. Revisiting past work reveals patterns in preference and technique, guiding future projects.
Get Started on Your Mandala Journey
Now that you know what tools are needed, the best paints to use, and a basic outline of steps to follow, you are well on your way to creating beautiful mandalas for yourself.
If you want to practice your dotting techniques and get introduced to using brushes to create swooshes, check out my beginners workbook. This workbook includes four sections of guided practice to help you on your mandala journey. Or if you want the workbook for free, sign up for my newsletter!